
I on the other hand can use all the help I can get, and even then I have trouble at times. Over the course of time I have aquired tools for the project that are basic for cutting and sanding. Being on a tight budget and a garage ninny I bought or was given tools that are on the lower scale in terms of price, these include a Craftsman 10" Bandsaw, A tradesman 10" tablesaw, a 6" belt sander from Harbor freight and a drill press, also from harbor freight.
Be aware that you get what you pay for and higher end tools with increase to a degree your accuracy and ease of working, but these have suited me fine(so far) for my entry level work.
These tools will be used in a variety of ways but to prep the necessary materials I need to cut/rip my 3/4 piece of Jabota wood so that I can make a riser that is 19" long, 1 3/4 thick and 3 3/4 tall. I'll add an accent strip of Purple Heart as well but first I must cut the Jabota. Of course I don't have a picture of this but I will mention that because of budgeting concerns I bought the best board I could find for the least amount of money. This meant that I had to plan out my cuts not only interms of length but thickness to make sure that I could get the dimensions I wanted.
Cutting out the pieces for the riser were done on the table saw. As I said I also wanted an accent strip to make it more interesting (pretty). This was done by cutting 1/2 pieces of purple heart and jobata and sandwiching them in between two thinned pieces of bamboo florring and glued up.
These cuts were done on the tablesaw and really should have been done on my band saw. The glue lines aren't all that great and I think part of that is due to the quality of the cuts to the small pieces. At the time all I had was an 1/8 blade for the bandsaw which is totally inadequate for my use. Since then I have put on a 1/2" blade which works much better.
I then glued it all up and clammped it together with Urac-185 which is a good glue and doesn't need to be baked but does have a brown color to it. The rest of the bow will be done with Smooth-on which is clear.

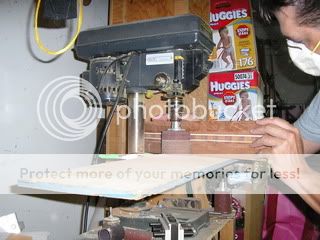
After the glue was cured I cleaned up the riser with a sander on the drill press as well as the belt sander.
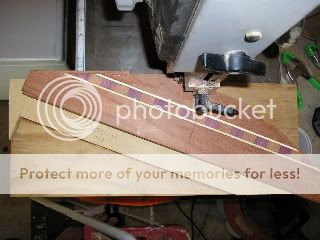
Next I had to cut the angles for the riser fades. For this bow the plans call for a 20 degree angle. I made a jig for the tablesaw that would create this cut. I don't have a picture of the jig but I do have a picture of the result.

As you can see I totally jack up that cut. I can atribute it to a couple of problems that were not only avoidable but were due to a complete lack of planning on my part. The jig I made, while positioning my riser at the correct angle was tested with a small piece of MDF (press board) cut to riser size. What I didn't acount for was that the small 7" blade I have on my table saw was not big enough to cut completely through the riser. With some advice from the guys at Pirates of Archery They advised just re-cutting and adding in the thickness lost with another piece of wood.
Ok simple right? Just change blades to a bigger one that will cut all the way through. NOT! I tried for a couple hours to remove that old blade. I sprayed it with WD-40, pulled on it with the supplied wrenches, said prayers and ended up curled in a little ball of sweat on the garage floor admitting deafeat and crying for mercy!Nice to know I'll have that blade for the rest of my life.
OK plan B. Table saw is out of the question unless I want to make two jigs for one cut. I don't, so I'll try with the band saw. My concern with the band saw is, one, that it is a small band saw and wasn't sure it was up to the challenge and two, that the hardness of the purple heart would dull my blade real quick. Let's give it a shot anyway.
First a jig. Using my template riser made from MDF I glued up the angles for my jig.

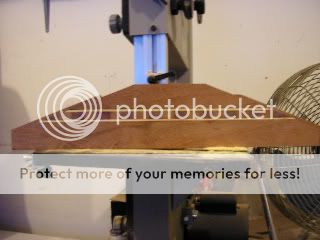
As you can see the board holds the riser at (in this case) a 20 degree angle to the side of the jig. Here's a picture of the cut riser in the jig.
With this small of a band saw it was important to cut slowly and not force it through. A small piece of steel stock was clamped to the edge of the table to ensure I pushed the jig through straight.
Next I glued on a couple of pieces to the fades to make up for the extra cut I made and the loss of width.
Lastly in talking again with the Pirates, the glue lines were a concern and they suggested that I fill any gaps with sawdust and super glue. I did that and sanded it all smooth.
I really hosed this riser and made a mistake at almost every step. But hey, I learned a lot and hopefully it comes out ok in the end. Next step making laminations for the limbs.
No comments:
Post a Comment